Giới thiệu cơn sốt mang tên Hitclub
Hitclub là cổng game gây được tiếng vang lớn thị trường online. Vì dù sinh sau đẻ muộn, nhưng trang game lại nhanh chóng thu hút hơn triệu thành viên và hàng trăm ngàn lượt tải về. Là một địa chỉ được ra mắt nhằm phục vụ khách hàng Việt, nên nơi đây toàn những tựa game kinh điển và thịnh hành bắt kịp xu hướng người dùng nhất.
Theo thống kê từ Google Trends, độ phổ biến của hệ thống tăng vọt từ dưới 25 lượt tìm kiếm/giây lên trên 75 lượt tìm kiếm/giây ở hiện tại. Với các khu vực tìm kiếm cao nhất gồm Bà Rịa – Vũng Tàu, Lạng Sơn và các tỉnh khác. SEMRUSH ghi nhận cổng game đạt 74,0K lượt tìm kiếm, đây là một con số đáng nể phục mà ít địa điểm nào đạt được.
Tuy nhiên, không chỉ gói gọn hoạt động tại nội địa, mà sân chơi còn vươn tầm khi lấn mạnh sang các khu vực khác ở Châu Á như Thái Lan, Hàn Quốc, Nhật Bản,.. Dù ở thị trường nào, nền tảng cũng nhanh chóng được yêu thích nhờ sự uy tín và dịch vụ xuất sắc.
Chuyên mục sản phẩm Hit club giải trí thịnh hành nhất năm
Hit club đã đầu tư tiền tỷ cho hệ thống game đa dạng, chất lượng cao. Mỗi siêu phẩm đều được chăm chút tỉ mỉ, kỹ lưỡng tạo nên các bom tấn thật sự. Dưới đây là danh sách sản phẩm hot khiến các tay chơi mê đắm nhé.
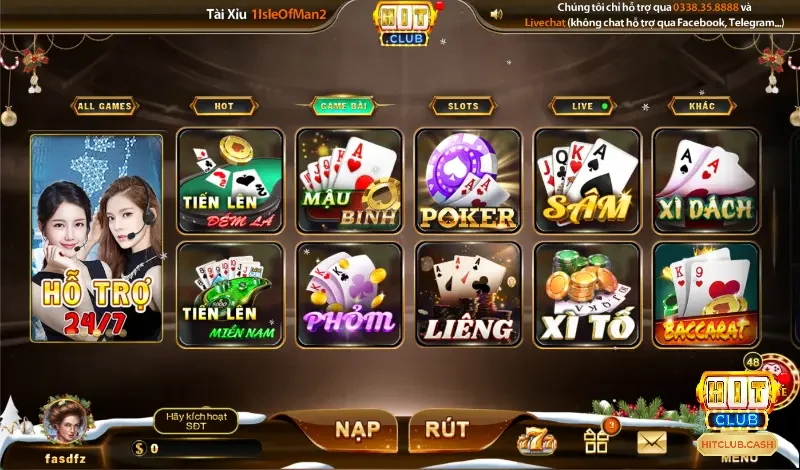
Game bài Hitclub đỉnh cao

Tại Hitclub, các khách hàng sẽ được đắm mình trong một sòng bạc 3D cao cấp với loạt siêu phẩm đánh bài cực hot. Đây cũng là dòng sản phẩm chủ lực mang lại nguồn doanh thu khủng cho cổng game. Đến đây, bạn sẽ tìm thấy những tựa game quen thuộc gắn liền với nét văn hóa Việt Nam như:
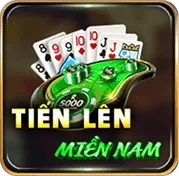
- Tiến Lên Miền Nam: Game bài kinh điển đòi hỏi sự nhanh nhạy và khả năng lập chiến thuật linh hoạt để giành chiến thắng.
- Phỏm: Game bài truyền thống yêu cầu member cần phát huy kỹ năng sắp xếp và đoán bài đối thủ để về nhất.
- Sâm Lốc: Cách chơi tương tự Tiến Lên nhưng với các quy tắc khắt khe hơn, bài Sâm dành riêng cho những ai thích thử thách và game có độ khó cao.
- Mậu Binh: Thể loại trò chơi đánh bài đấu trí, tuy hơi khó nhằn với người mới nhưng vẫn rất đáng để thử.
- Ba Cây: Với các ván chơi nhanh, quyết định thắng thua mau lẹ, 3 cây là tựa game nhận được sự đón chào của đông đảo hội viên tại đây.
Với kho game bài đổi thưởng phong phú và liên tục được cập nhật, Hitclub đảm bảo khiến bạn vui quên lối về. Đây không chỉ là nơi để xả stress cực mạnh hiệu quả sau những giờ làm việc căng thẳng, mà còn là nơi để hội viên kiếm tiền tươi sau các ván bài kịch tính.
Quay hũ Hit Club phát tài

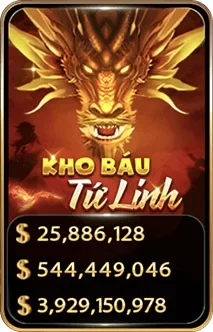
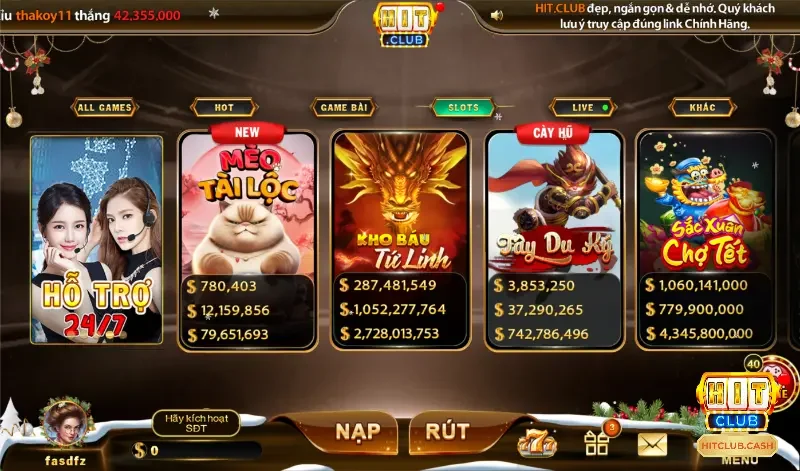
Hitclub được biết đến như một thiên đường của game nổ hũ với kho trò chơi siêu khủng. Với hàng trăm tựa game slot đa dạng, đồ hoạ mãn nhãn và âm thanh sống động, hệ thống khiến các hội viên say đắm trong những vòng quay. Một số game nổ hũ thịnh hành, với hơn triệu lượt quay mỗi ngày như:
- Kho Báu Tứ Linh
- Sơn Tinh Thuỷ Tinh
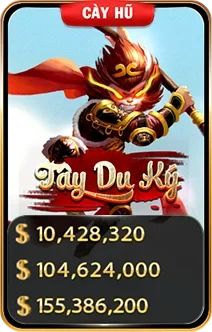
- Tây Du Ký
- Ăn Khế Trả Vàng
- Kho Tàng Ngũ Long
- Cung Hỷ Phát Tài
- The Witcher
- Thần Tài
Ngoài ra, hệ thống còn không ngừng update sản phẩm mới như Sắc Xuân Chợ Tết, Nổ hũ Mèo Tài Lộc, Bí Mật Cleopatra,… để member uôn có những trải nghiệm mới mẻ và không bao giờ cảm thấy nhàm chán. Đặc biệt là quỹ thưởng hũ luỹ tiến, có thể lên đến hàng trăm triệu, thậm chí là vài tỷ đồng. Những tay chơi cày hũ thường trực tại đây để chờ đợi cơ hội săn Jackpot thành công về tay.
Thể thao Hit

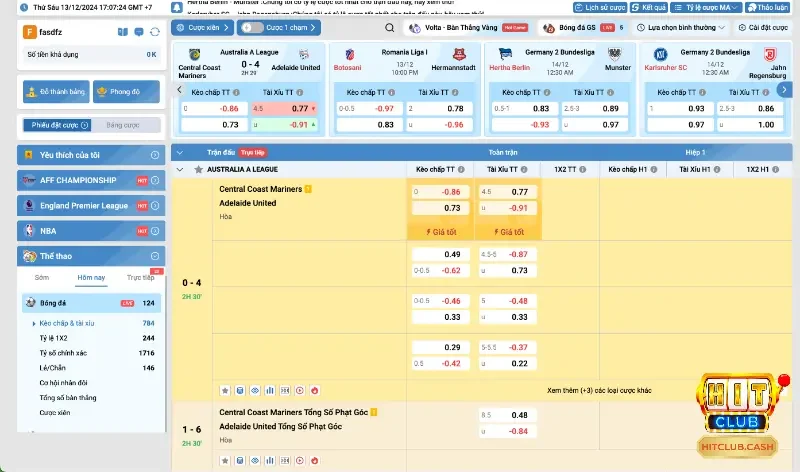
Nếu khách hàng là người đam mê đỏ đen với các trận đấu thể thao đỉnh cao, Hitclub cũng sẽ không khiến bạn thất vọng. Với sự đầu tư bài bản, hệ thống mang đến 3 sảnh cược K – Thể Thao, O – Thể Thao, S – Thể Thao với chất lượng tuyệt đỉnh. Đặc biệt, các trận đấu từ lớn đến nhỏ đều được cập nhật realtime 24/24, đảm bảo hội viên không bao giờ bỏ lỡ bất kỳ trận cầu hấp dẫn nào.
Những sảnh này mang đến các môn thể thao đa dạng như bóng đá, cầu lông, bóng rổ, bóng chuyền, quần vợt, golf,.. với hơn 1000+ kèo hot như tài xỉu, cược chấp, châu Âu, kèo thẻ phạt,… Tại đây, các khách chơi sẽ có thể bắt kèo dựa trên bảng tỷ lệ được update bởi hệ thống. Thông tin trận đấu, tỷ lệ kèo, odds thưởng đều được thể hiện rõ ràng, minh bạch giúp các cuộc chơi diễn ra sạch, đẹp.
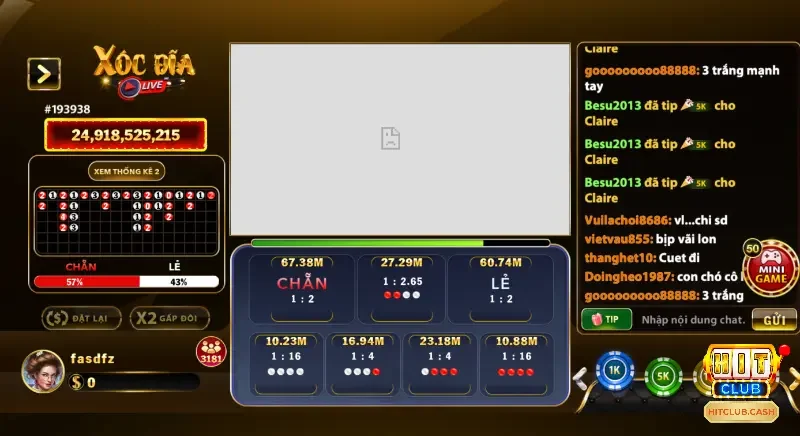
Siêu phẩm xóc đĩa Hit Club

Xóc đĩa là đứa con tinh thần cược cổng game chi rất nhiều tiền bạc để phát triển. Điểm đặc biệt là khi tham gia, member sẽ được tương tác trực tiếp với Dealer người thật. Các cô em xóc đĩa nóng bỏng khuấy động không khí khiến các bàn cược bốc hơn bao giờ hết. Hơn thế nữa là tỷ lệ trả thưởng từ hệ thống cao X2, X3 so với ngoài đời, điều này hấp dẫn đông đảo các tân thủ đến và tham gia mỗi ngày.
Lô đề
Lô đề mang tính giải trí cao, thu hút các thành viên nhờ luật đơn giản mà lại dễ trúng. Tại Hit Club, hội nuôi lô sẽ được trải nghiệm đặt cược với tỷ lệ trả thưởng hấp dẫn lên đến 1:99. Điều này vượt trội so với khi bạn chơi ngoài đời và hoàn toàn không mất phí trung gian. Sảnh lô đề hội tụ đủ tinh hoa khi có sẵn các hình thức xổ 3 đài Bắc, Trung, Nam và nhiều cách chơi phong phú như ba càng, đề đầu đuôi, lô số.
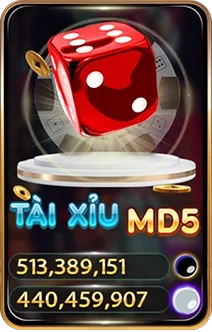
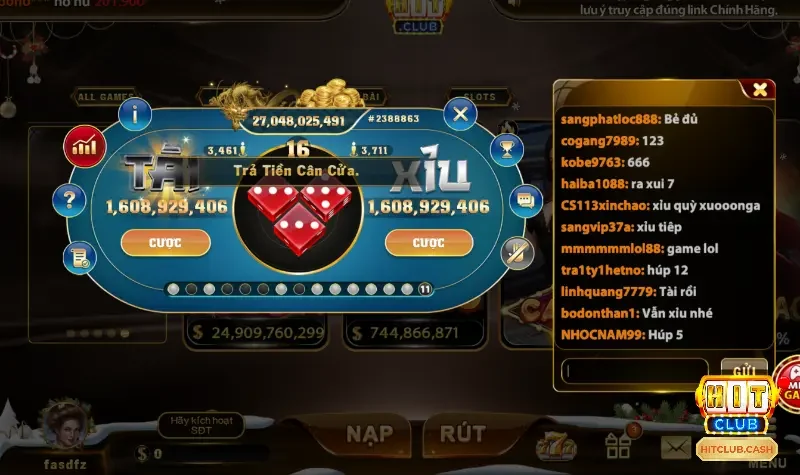
Tài xỉu hitclub

Tài xỉu tại Hitclub luôn thu hút đông đảo người tham gia nhờ tính đơn giản, dễ chơi, dễ trúng. Tại hệ thống, có rất nhiều thể loại game tài xỉu với vô số phòng chơi cho khách hàng lựa chọn. Trong đó các sản phẩm tài xỉu nổi bật nhất phải kể đến:
- Tài xỉu live: Người chơi dự đoán tổng điểm của ba viên xúc xắc, với quy tắc cực kỳ cơ bản. Tổng từ 3 đến 10 là “xỉu”, từ 11 đến 17 là “tài”, ngoài ra còn có các cửa phụ như xỉu chủ, ba số đồng nhất,…
- Tài xỉu MD5: Game này cũng thu hút lượng lớn member nhờ tính minh bạch và uy tín cao. Điểm đặc biệt của trò này là kết quả có thể được kiểm tra qua bên thứ ba nhằm kết quả xanh chín, công bằng tuyệt đối 100%.
Các game nóng khác
Thư viện giải trí tại đây được cập nhật liên tục để mang lại cảm giác mới mẻ mỗi ngày. Ngoài những danh mục kể trên, khách mới nhất định không nên bỏ qua các siêu phẩm bắn cá, đào vàng, Keno, Number game,… Và những bom tấn mini game Hit club chơi nhanh thắng khủng như:
- Kim Cương
- Mini Poker
- Bầu Cua
- Trên Dưới
Lý do Hitclub gây bão thị trường giải trí online
Hit club nhanh chóng khẳng định vị thế trên thị trường nhờ xây dựng được một đế chế giải trí toàn diện. Nền tảng thu hút đông đảo người chơi nhờ những tính năng vượt trội. Dưới đây là các ưu điểm nổi bật giúp hệ thống chinh phục được trái tim của các gamer:
Hợp pháp và minh bạch
Hitclub là cổng game uy tín hàng đầu, được cấp phép hoạt động bởi nhiều tổ chức danh tiếng trong ngành như:
- GSC Isle of Man
- PAGCOR
- Curacao Gaming
- CEZA và FIRST CAGAYAN
- Ngoài ra, với sự hỗ trợ tài chính mạnh mẽ từ công ty mẹ giúp sân chơi cam kết thanh toán, hoàn trả đủ cho mọi vé cược một cách nhanh chóng.
Bảo mật quốc tế
Hitclub sử dụng hệ thống mã hóa SSL 128bit hiện đại, tường lửa hiện đại và đăng nhập bằng mã OTP đảm bảo an toàn tối đa cho thành viên. Bên cạnh đó, hệ thống phát hiện gian lận hoạt động hiệu quả, giúp sân chơi duy trì môi trường minh bạch và công bằng cho tất cả member.
Đường truyền ổn định
Nhờ hệ thống máy chủ đặt tại nước ngoài, Hitclub mang đến đường truyền ổn định, hạn chế tối đa tình trạng gián đoạn. Khắc phục vấn đề giật, lag thường gặp ở các cổng game khác, website nâng cấp băng tần lên 95Hz, mang lại trải nghiệm liền mạch, ngay cả trong giờ cao điểm, lượng người quá tải.
Kho game khủng, code ngập tràn
Nền tảng cập nhật kho game liên tục để tránh hội viên bị nhàm chán. Mỗi bản cập nhật đều hứa hẹn mang đến sự sáng tạo, đáp ứng tối đa sở thích và kỳ vọng của thành viên. Cùng với đó là các chương trình săn code thưởng khủng, mang lại giá trị giải trí cao cho người dùng.
Chơi game đổi thưởng khủng, nạp rút 1-1

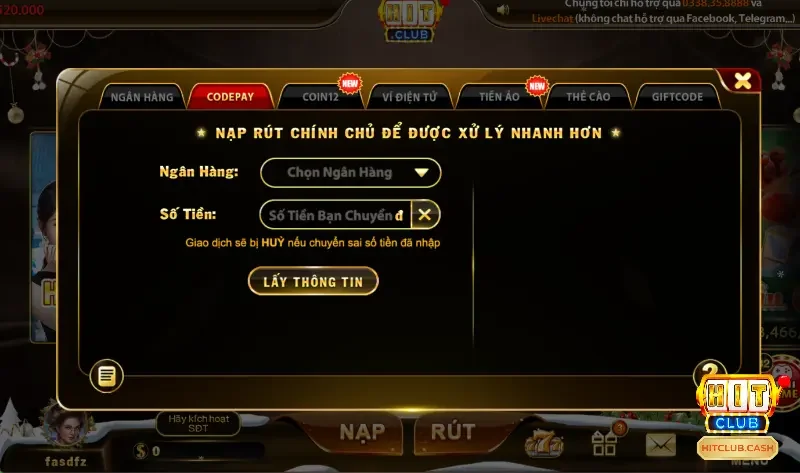
Hitclub mang lại cơ hội làm giàu vượt trội với tỷ lệ chiến thắng lên đến 95%. Cơ chế nạp rút 1-1 không thu phí, đảm bảo tiền thưởng của khách hàng được nguyên vẹn. Ngoài ra, hệ thống đảm bảo mọi giao dịch chỉ mất từ 3-5 phút để hoàn tất, hỗ trợ nhiều phương thức thanh toán từ ngân hàng, ví điện tử đến tiền ảo.
Chương trình khuyến mãi và giftcode Hitclub ngập tràn

Hitclub nổi bật với loạt ưu đãi khủng, mang đến cơ hội nhận code giá trị cao cho mọi người. Đặc biệt, chương trình khuyến mãi tại đây không chỉ hấp dẫn mà còn dễ dàng tham gia như:
- Nhận ngay code 50K khi thành công nạp 1 triệu bằng hình thức gửi vốn qua thẻ cào.
- Tương tác với fanpage để sở hữu thêm nhiều mã code cực kỳ giá trị.
- Ưu đãi nạp không giới hạn, tặng thưởng 2% khi gửi vốn qua Coin.
- Nhận thưởng 2K khi đạt tổng cược 200K với bất kỳ sản phẩm nào tại hệ thống.
- Các dịp lễ, tết luôn có chương trình lì xì, thưởng nạp và vô số ưu đãi đặc biệt.
Với những chương trình khuyến mãi được cập nhật liên tục, web game cam kết mang lại một thương hiệu giải trí hấp dẫn. Cổng game sẵn sàng đáp ứng mọi nhu cầu giải trí và giúp ai ai cũng nhận được giá trị tốt nhất.
Hướng dẫn cách đăng ký hội viên Hit club
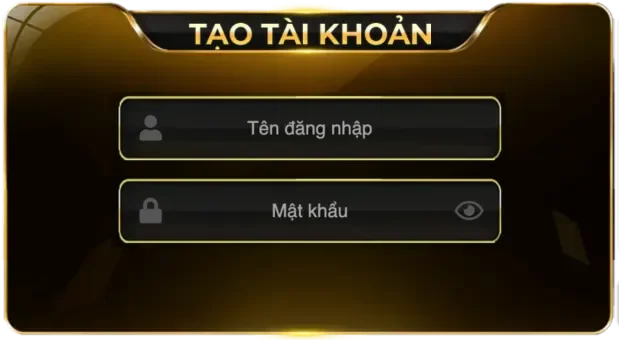
Để tạo tài khoản member Hit club, người dùng chỉ cần thực hiện theo 3 bước đơn giản. Quy trình này giúp lính mới hoàn tất việc đăng ký chỉ trong vòng 2-3 giây, nếu các thông tin đều hợp lệ. Dưới đây là hướng dẫn cơ bản cách làm cho tay mơ lần đầu tham gia:
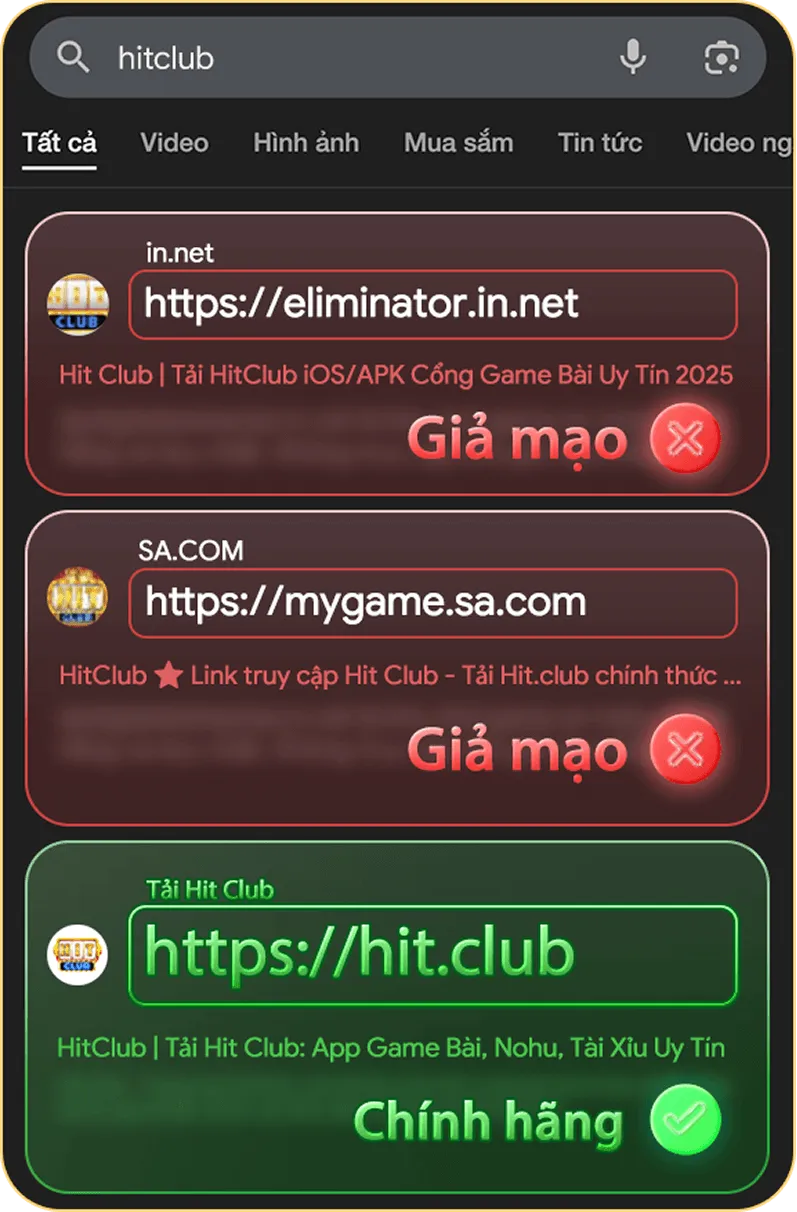
- Bước 1: Sử dụng các trình duyệt phổ biến như Google, Safari hoặc Cốc Cốc để tìm kiếm trang web. Hãy ưu tiên chọn những đường link uy tín, hiển thị ở đầu trang kết quả tìm kiếm nhằm tránh gặp phải các website lừa đảo.
- Bước 2: Bạn nhấn vào khung “Chơi Ngay Bản Web” => Sau đó, nhấp vào ô “Đăng ký” ngay trên giao diện màn hình chính => Sau đó, newbie điền đầy đủ các thông tin cá nhân được yêu cầu trong biểu mẫu bao gồm tên đăng nhập, mật khẩu, nhập lại.
- Bước 3: Tiếp theo, chọn nút “Đăng ký ngay” để gửi lệnh tạo tài khoản cho hệ thống. Cuối cùng, tân hội viên chọn một cái tên chơi game (tên hiển thị) để sử dụng trong suốt quá trình trải nghiệm.
Hitclub không ngừng làm mưa làm gió khiến các tay chơi phải trầm trồ thán phục. Những trải nghiệm tại đây chắc chắn sẽ không kiếm được ở nơi nào khác. Hãy nhanh tay đăng ký để thử thách bản thân, kiếm tiền tươi ngay nhé.